Wednesday, February 24, 2016

Free halter dress pattern and tutorial


Last year my cousin was getting married and had asked if my daughter could be the flower girl in her wedding. My daughter loved the idea of getting to throw flowers about. They offered to buy a flower girl dress, but they are a young couple and were paying for the wedding themselves so there was no way I was going to let them do that. I had never sewn anything formal before, but I love a challenge.  I wanted a dress similar to the bridesmaids dresses but was surprised that I could not find a pattern quite like I wanted. So, I drafted one! 


 With Easter approaching quickly I figured it would be a good time to share this pattern with all of you. Lucky you ;)


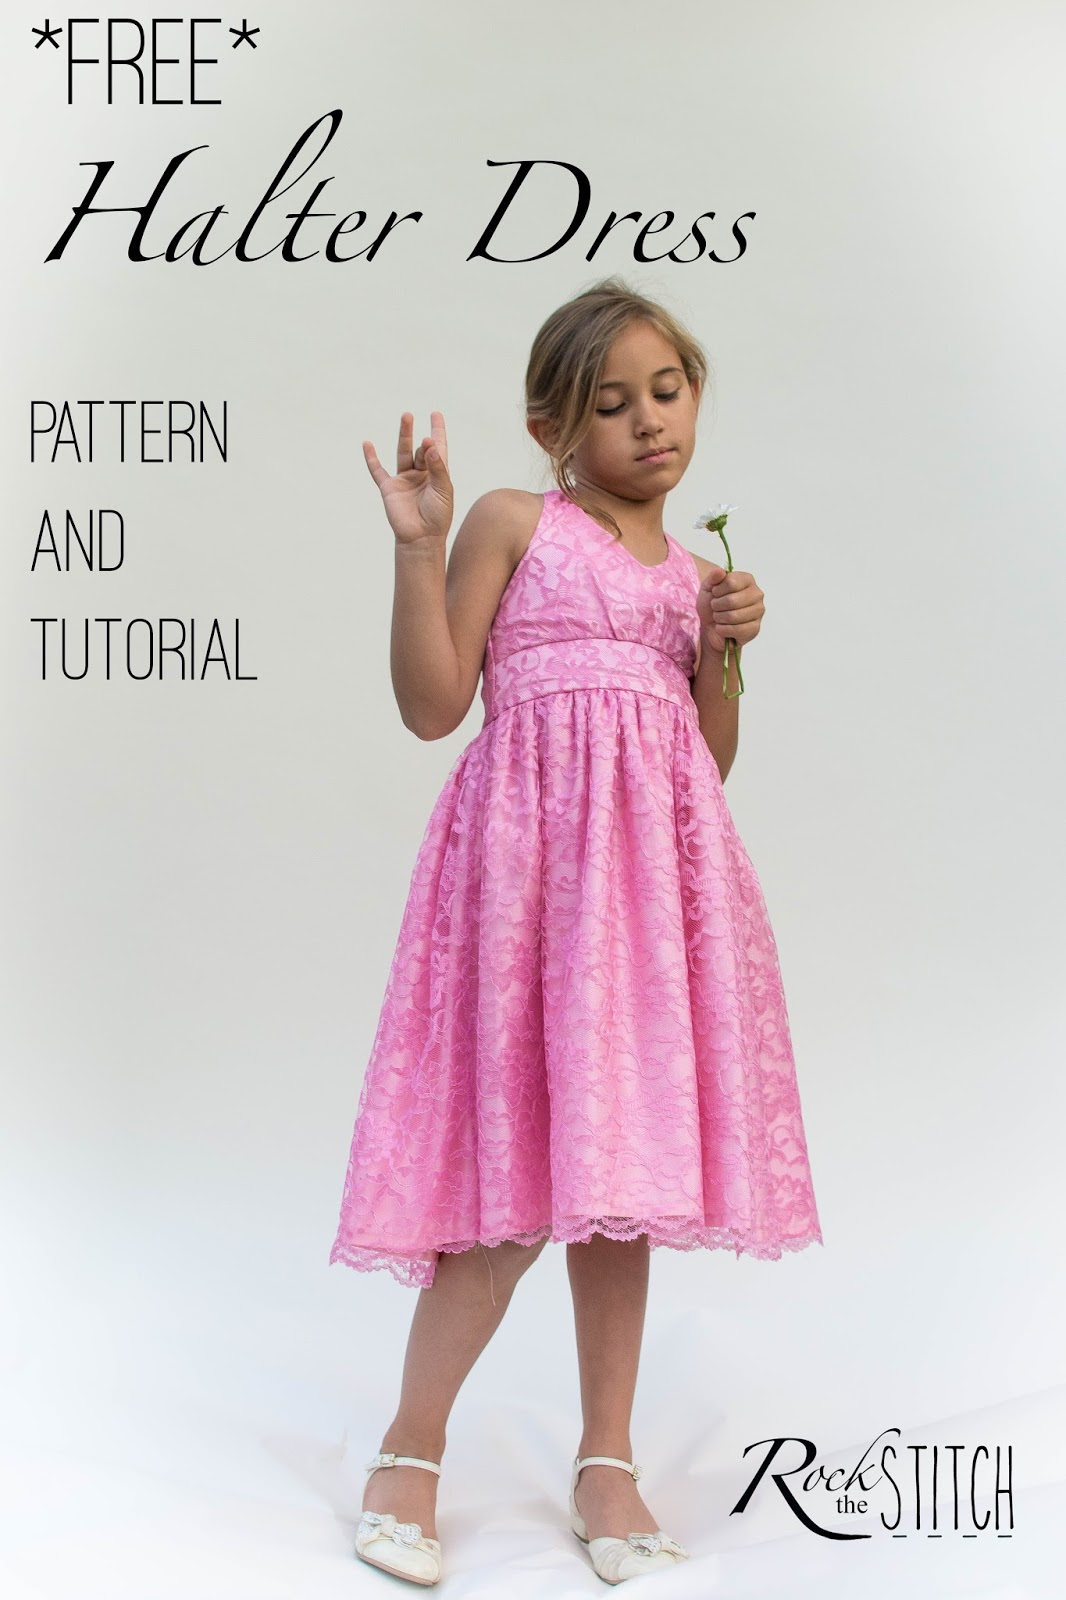
This pattern has gentle gathering on the front bodice, a rounded "V" neckline, and gathered skirt. The halter strap closes with snaps and the back closes with a zipper. 
For the flower girl dress I used satin taffeta with a lace overlay. I am pleased with how it all worked out. But this pattern can be used for everyday dresses too. For my muslin I used quilting weight cotton and it made a pretty summer dress. 


Oh, I almost forgot to mention that the pattern is size 7. Maybe someday I will grade it out to more sizes.

Okay now, let's get on with the tutorial!

For this pattern you will need:
2 yards of fabric
1/4 yard lining
2 size 20 snaps
1 seven inch all purpose zipper
small scraps of fusible interfacing 2" x 3"

And, of course, you will need the pattern. Download it HERE!

There is a 3/8 inch seam allowance included on all pattern pieces.


 First, we start by basting two lines along the bottom edge of the bodice front.


Pull bobbin threads to gather until the bottom of the upper bodice is the same width as the top edge of the lower bodice.


Sew the lower bodice piece to the upper bodice with right sides together.


Press seam allowance up.


Fuse interfacing to 2 of the four back strap pieces.


Sew the interfaced back strap pieces to the straps and sew the back bodice pieces to the front bodice.


Press seam allowances open.


Repeat for the lining, except this time you are using un-interfaced back strap pieces.


Press seam allowances open.


Sew the lining to the bodice along the upper edge as indicated above. Leave 1 inch unsewn on both ends. 


Clip corners and curves. Fold bottom edge of lining only up 3/8 inch and press. Turn right side out.


I had to zoom way out here so we could see all of the skirt. 
Baste two lines along the upper edge of the skirt.
Fold bottom edge up 1/2 inch, press, then fold up another 1 inch and press again.
DO NOT stitch the hem just yet. We will come back to it.


Pull bobbin threads to gather skirt until it is the same width as the waistline of the bodice.


Flip the lining out of the way and sew the outer bodice to the skirt. Press seam allowance up.


Place a mark on your skirt where the bottom of the zipper stop is.


Flip the hem down and sew skirt with right sides together up to the mark you just made.
Press seam open. Flip hem back up and stitch it 1/8 inch from the upper fold. (not pictured)


Turn bodice wrong side out again. You don't need to push the straps back through to the wrong side; only the body of the bodice. Pull the lining back where it was left unsewn. Place zipper face down along back edge of bodice. (Please ignore that the zipper pull is showing on the wrong side. I used a pattern brush and couldn't remove the zipper pull to make it look like it was flipped face down. I could have manually drawn it all out, but it would have taken FOREVER, and, eh, it's a free pattern. LOL)


Line up the edge of the lining with the back bodice with the zipper sandwiched in between. Using a zipper foot, sew close to the zipper teeth all the way down the zipper. Careful not to catch the other side of your dress in the stitches. Sew across the top edge of the bodice where we had left it unsewn.
Clip corner.
Flip this half of the lining right side out to reveal the zipper.
Repeat for the other side.


Stitch in the ditch along the waistline catching the lining in your stitches to secure the lower edge.
Alternatively, you can hand sew your lining. For the flower girl dress I chose to hand sew.


Topstitch around outer edges of bodice.
Apply your snaps to the strap and you are done! 

I hope you enjoyed this tutorial. I would love to see the dresses made with this pattern! Please join me on my Facebook page HERE and share any dress you make with it.


Sunday, February 21, 2016

How to lengthen the Trinity Tee

So you have a tall slender child and want to adjust the Trinity Tee for a longer length. 
Even though the Trinity Tee is quite unique in shape, lengthening, 
or shortening, can be done pretty easily.


In this tutorial we are going to use the slash and spread method for lengthening.
Let's start with the back panel.


Measure down the back panel from the nape to the waist and draw a line across the width, perpendicular to the center back. (shown in blue)


Align the diagonal side of the front panel with the diagonal side of the back panel. Make a mark on the front panel where the line you made on the back panel touches. (circled in picture)


 Draw a line across the width of the front panel, perpendicular to the center fold line, where you made the mark.


These two lines you just made are your "slash" lines. Cut your pattern pieces across these lines.
Next you will spread your cut to the amount you wish to lengthen the pattern. It is important to keep the edges of your pattern aligned. To make this easier I like to draw lines on tracing paper to align my pieces.
Here I am lengthening the pattern by 6 cm. Draw a vertical line to help align your pattern pieces as they are spread. Anywhere on the line draw two lines perpendicular to the vertical line and 6cm apart from each other.


 Now lay your back panel pieces over the paper. Align center back with the vertical line and the edges you cut along the horizontal lines. Tape or glue the pattern pieces to the tracing paper to secure.


You will now need to redraw the diagonal side of your back panel. Draw a straight line from the underarm down to the upper corner near the hem (I have no idea what to call this!). (shown in red below)


Cut off the excess paper and viola! (cut along dashed line as shown in picture below)


You now have a new, longer, back panel. 


Now it is time to do the same thing to the front panel. This is where it may take a little trial and error because if you lengthen the front the same amount as the back it will be too long.


This will not do! I found that I needed to lengthen the front panel about 1cm less than the back panel, but this will vary from size to size.
So, for consistency's sake, let's go through lengthening the front panel.
Draw a vertical line on tracing paper. Then draw two horizontal lines, making sure they are perpendicular to the vertical line. The distance between the lines is the amount you wish to lengthen the front panel. In my case it is 5cm.


Now place your front panel over the paper with the center fold edge aligned along the vertical line drawn and the edges you cut along the horizontal lines drawn. Tape or glue the pattern pieces to the tracing paper to secure.


Re-draw the diagonal side just as you did with the back panel. (shown in red). Cut off the excess paper.


Compare the length of the diagonal sides on the front and back panels. If the front panel is too long you can make a fold along the spread to take up the length. It is important to keep the center fold line aligned or your panel will be misshapen. Draw a new diagonal line if needed. 


When the diagonal sides align properly it will look as it does below.


You can also lengthen the sleeves in the same manner. Keep in mind that the 3/4 and long sleeves will have a cuff in addition to the sleeve length. 
Measure the distance from the underarm to the wrist. Mark a line at the midway point. This should be just above the 3/4 sleeve edge. 


Cut the sleeve along this line. 


On a piece of tracing paper draw a vertical line and two horizontal lines as we did before. The distance between the horizontal lines is the amount you wish to lengthen the sleeve. Align your sleeve pieces along the lines you drew and secure them to the paper with tape or glue.


Re-draw the underarm seam staying true to the curve of the pattern piece. (shown in red)


Cut off the excess paper once again, and there you go! All done.


Even though the pattern shapes are a little crazy, lengthening is easy peasy!
Shortening the pattern can be done the same way, except you will overlap your pattern pieces instead of spreading them. See the example below.


But say your child is very tall and skinny but also has wide shoulders. Or maybe they have a wide chest but have narrow shoulders. Then blending between sizes is likely a better option for you. I hope to have a tutorial for blending sizes soon; as well as lots of other modifications. It will be fun! See you then :)